Showing posts with label recipe. Show all posts

Sunday, April 17, 2011

Some Days Are More Difficult Than Others (A Boyfriend Post)

For those of you who know Kelly Riley, you know she's been taking her punches lately on the career front. That's twice now a certain local publisher has treated her--in my mind--with a lot less respect than she deserves. If you go back a few Fridays, not only did this publisher finally communicate that she didn't get the much desired position Kelly has wanted since moving to Minnesota, but the her current/not-current/current employer was also toying around with this lovely person.

It's a difficult thing to watch when someone you love is being treated so poorly by people she is better than. And there can be a feeling of helplessness knowing there is not much you can do about it. On this specific Friday, however, I took it upon myself to do what I could within my power to make sure this difficult day didn't get any worse than it already was--I arrived home after work on that Friday with a bag full of culinary delights and flowers.


In the grocery bag were a few of her favorite things: there was cheesecake, there was lemon ice cream and the ingredients for a delicious home cooked meal too. Chicken, lemons, cream, butter, potatoes and cheese--there are just a few of her favorite things. Do you see a theme here? We got cooking and had gnocchi and chicken with a lemon cream sauce! Oh and a "Kelly Riley Salad" made of iceberg lettuce, red bell peppers and cucumber with a light, homemade vinaigrette. It turned out to be a wonderful evening. We hung-out in our kitchen, worked together to create a meal and for a few brief hours Kelly forgot her woes.

Just because you get some release doesn't mean the difficult things in life go away. That's how things work, though, and we all learn to work through every day in our own way. As you can see, our household focuses on food--and here we come to the following night's meal and the recipe of this post: Pasta with Chestnuts, Pancetta and Sage via Epicurious.

We happened--don't shun us because this might sound pretentious--to have a jar of chestnuts in the pantry and pancetta in the freezer. Though we didn't have the called-for tagliatelle, we did have some angle hair pasta on hand. So, Saturday being Saturday, we opened a bottle of wine and began that evening's work. Mise-en-place is common phrase at our place. While Kelly watched, talked and listened we had Girl Talk on in the background and the preparations began.

The recipe called for 'crumbling' the chestnuts. When you see a jar of nuts, you don't usually associate that word with the limitations of what you can do with the ingredient. The things crumbled with ease however, since they are already roasted and ready to go. Very convenient!


From there it was easy--chop, dice, grate and you're ready.


Then you saute, boil, toss and it's done!


Some days are more difficult than others.

Sunday, December 26, 2010

Hot Chocolate...on a STICK.


So, it's been three months since my last post. I'm pretty much the worst blogger on the planet. You're about to forgive me though, because I come bearing Hot Chocolate on a Stick.

Part of living in Minnesota is surrendering myself to the notion that every type of food imaginable can and should be served on a stick whenever possible. The winters are very, very dark and long here; I'm not going to begrudge anyone whatever amusement they can find. If putting a wooden skewer through a snack makes you happy, then more power to you!

Given that I've garnered a bit of a reputation when it comes to all things edible over the past year, I knew that whatever Christmas gifts I gave this year had to include something homemade and delicious. I didn't want to send anything too delicate that might break or spoil during shipping, so that ruled out most of my original ideas. By sheer luck I stumbled across this post on an adorable blog called Giver's Log and knew instantly that I'd found the perfect thing.

I made 68 of them, because I am just that crazy.

David was away deer hunting almost every weekend (we recently bought a 7 cubic ft freezer chest to hold all the venison meat. And David claims to have grown up in the suburbs), so luckily I had the whole kitchen to myself. Sixty-eight chocolates molded in Dixie cups with sticks and candy canes poking out of them take up an astonishing amount of space. 


The most time consuming part of the entire project was actually the packaging. I made three flavors: original, peppermint, and cinnamon. I wrapped each individual stick in plastic and tied it up with ribbon, hemp twine, and a little label indicating the flavor. Then I grouped them up and placed them together in larger bags--four to a pack--and added another label with directions.


We had a huge blizzard the weekend that I made all of these. It was so cozy to be inside my apartment melting chocolate and eating broken candy canes while the snow piled up outside. I may also have had a mug of hot chocolate or two. I mean, someone had to be the taste-tester and David was up in Wisconsin sitting outside in the freezing snowstorm waiting for Bambi to come along, so I had to bite the bullet myself. Tough job.


Hot Chocolate on a Stick 
adapted from Giver's Log

Yield: approximately 10 sticks of Hot Chocolate

WORD OF WARNING: Do not let so much as a drop of water near your chocolate or it will seize. If it seizes (and you will know if it does because it will become a grainy, horrible mess) it will still taste delicious, but it won't look as pretty. If you don't care how they look, then you don't have to be so vigilant. Make sure that all of your equipment is bone-dry. NO LIQUIDS. This means that you can't add booze to these (just splash some into your mug once it's all made!) or things like vanilla or almond extract. If you want to add flavorings they should be in powder or paste form only.

You will need: a double boiler (or a metal bowl over a sauce pan), a piping bag (or a ziploc bag), chocolate molds (Dixie cups and ice cube trays work just as well),  a wooden spoon (or whisk, I quickly abandoned my spoon for the whisk. Use what works best for you!), and sticks (wooden dowels, lollipop sticks, popsicle sticks, candy canes, cinnamon sticks, whatever!).

Ingredients:
  • 8 oz high-quality chocolate, between 60 to 72% cocoa. Do not skimp on the chocolate. I used Guittard and it was amazing. 
  • 1/4 cup of cocoa powder
  • 1/2 cup of powdered sugar
  • pinch of salt
Directions: 

Set up your molds and have your sticks handy.

Sift together the powdered sugar, cocoa powder, and salt. Please do not skip this step. Sift. Please sift. Then set aside. 

Gently melt chocolate in a double boiler until about 2/3 of the chocolate is melted and a few solid pieces remain.

Take off heat and add the powdered sugar mixture. Stir, stir, stir. It will be very, very thick, like frosting. If it looks like a big old gritty mess, just keep stirring; it should smooth out soon enough. The final product will be smooth and very glossy and shiny. Immediately transfer to the pastry bag and pipe into your molds. You want 1 oz of chocolate in each mold. If you have a kitchen scale it is immensely valuable here. If not, try to split the chocolate evenly between 8-10 molds. Add a stick and let it harden--usually I give it about 2 hours to be safe, though they are often set before then. (If you use candy canes for the sticks, you will need to prop them up. After much trial and error and an awful lot of swearing I found that hooking them on a bowl worked best. Of course, I didn't have a bowl that was the perfect height, so I supplemented by adding crumpled tinfoil around the rim). When chocolates are set, remove from molds. Hot Chocolate on a Stick will keep well for up to one year in an air-tight container. Do not store in the fridge or freezer.

Decorating (Optional):

I decided to dress mine up a little bit to make them extra-pretty. I bought some white candy melts and dipped the set chocolates into it and then either dipped them in colored sugar, or applied chocolate transfer sheets (the plaid decorations you see in pictures). There are lots of great ways you can play with these. I already have some good ideas for future batches. Be creative, and pretty much anything goes. 

To Serve: 

Stir 1 stick into 1 cup (8 oz) of hot milk until melted. If feeling incredibly indulgent, top with homemade whipped cream. Enjoy!


I hope everyone had a wonderful holiday season and that a joyous New Year's Eve awaits you. May 2011 bring you health and happiness. 

Much, much love. 


Monday, May 24, 2010

"You Can't Come, Kate" Coconut Cupcakes

So, LOST ended. 

And I might as well tell you right now that if you haven't watched the finale yet you can just scroll right to the bottom of the post for the cupcake goodness, cause there will probably be spoilers in this post. 

I watched a stray episode or two of the first season when it originally aired, but I had a lot of other stuff on my plate in 2004 and didn't latch on to the show the way I later would. 

In 2006 I hit a low point. Basically, I was in New York, dirt poor, had no real career to speak of, and had just gotten out of the most destructive relationship I'd ever been in. I pretty much dealt with the astounding depression by never, ever, ever leaving my bed, and steadily gaining approximately 20 pounds. Awesome, right? 


Not that LOST saved me or anything. I owe that to my unrelentingly fantastic friends and my own weird determination to keep on keepin' on regardless of what I'm up against. But sometime before I decided to get out of my bed I figured--since I'm just laying around ANYWAY--I might as well give this crazy TV show everyone is always talking about a shot. And then I watched the first three seasons in a week and a half. I've been hooked ever since. 

Since moving to Minnesota, David and I have been watching this final season of LOST with some of his cousins and their significant others. We alternate hosting and providing dinner, drinks, and dessert. It's a pretty sweet set up, because you only have to be responsible for one thing per week, which takes the pressure off. 

I volunteered to bring dessert for the finale; mainly because I have been wanting to try these pineapple flowers FOREVER and needed an excuse. I figured I'd go all tropical with my dessert to pay homage to the Island in my own humble way (and because, you know, pineapples are tropical) and came up with Coconut Cupcakes filled with Key Lime Curd topped with Cream Cheese Frosting and Pineapple Flowers. 

Originally, I wanted to use mango curd and planned to make my own using the ever-incredible Smitten Kitchen's recipe. But that would have taken a lot of time and effort, and I had already committed myself to 6 hours of making dried pineapple flowers. And, really? There's only so much time in the day. So I punked out and used store-bought Key Lime Curd instead. Sorry.


I have to admit, I was disappointed in the finale. But, ok, I didn't HATE it like I first swore I did. Maybe. I haven't gathered my thoughts quite yet. I used to dash off abrasive and rather hilariously pointed recaps of LOST for my friend Russ via email when he was unable to watch episodes. The tradition has since died, but he requested that I recap the finale for him, and I've promised to do so. Most of my legitimate thoughts on the show have gone into that thus far, and I'm left with only very incredulous caps-lock-y shrieks of outrage (CRAPPY AFTER-LIFE? FREAKING GOLDEN LIGHT OF HUMANITY? SAYID AND SHANNON, SERIOUSLY? SERIOUSLY?!)

But mostly, and above all else: I hate Kate. I have always hated Kate. Kate ruins everything. She is an everything ruiner. Everyone is constantly telling her that SHE CAN'T COME on whatever little island adventure they're having that day. They tell her this because if she comes, she will RUIN EVERYTHING. But does she listen? Hell no. BECAUSE SHE SUCKS. 

She for sure cannot have any of these cupcakes. 


"YOU CAN'T COME, KATE" Coconut Cupcakes 
Adapted from Simply Recipes

Ingredients

  • 3/4 cup of unsalted butter, softened
  • 1 1/4 cup of sugar
  • 3 eggs, room temperature
  • 1 cup of canned coconut milk
  • 1 teaspoon of vanilla extract
  • 1/2 teaspoon of almond extract
  • 2 1/4 cups of flour
  • 1 teaspoon of salt
  • 1 teaspoon of baking powder
  • 1/2 cup of sweetened desiccated coconut
Directions

Preheat the oven to 350 F. Cream together the butter and sugar. Add eggs one at a time, mixing well after each additions. Add vanilla, almond extract, and coconut milk. In a separate bowl combine flour, salt, and baking powder. Slowly add the dry mixture to the wet mixture a little bit at a time. Mix well after each addition. Gently fold in coconut. Bake for 18 to 20 minutes, or until a toothpick comes out clean. Cool on a rack completely before frosting. 

Cream Cheese Frosting

Ingredients
  • 1 package of cream cheese (Philly admittedly works best), softened 
  • 1 stick of butter, softened
  • 1-2 cups of powdered sugar
Directions

Cream together cream cheese and butter. Add powdered sugar slowly, mixing after each addition, until frosting reaches desired consistency. 

Dried Pineapple Flowers
Adapted from Axis of Ævil

Directions

Heat oven to lowest setting and cover a baking sheet with parchment paper. Peel pineapple and slice thinly crosswise (not too thin, or it will burn). Bake for 3-4 hours, turning over with tongs about every hour, or whenever tops begin to look dry. Remove from oven and place on a rack to cool for a few hours. When flowers are dry but still pliable use a flower cookie cutter, or hand shape the petals using a good pair of kitchen shears (I opted for the latter because I don't own any cookie cutters, but I really liked the control the shears gave me). Grip each flower by the center and gently pull petals upward to create a more realistic look. Return to the rack to finish drying. 


Kate hate forever!

Monday, January 11, 2010

a jar full of sunshine


When I was in college one of my best friends, Dan, came up to visit me several times a year. One of those years, on one of those visits, we embarked on what is to this day the greatest grocery shopping trip I have ever been on in my life.


I can't really explain why, only that it's one of those seemingly unremarkable days, those everyday-days in which nothing really happens, and yet you'll always, always cherish it. A little slice of memory that perfectly sums up your friendship.


We spent hours (yeah) in the store, wandering up and down the aisles, throwing completely random things into our cart on a whim because we liked the packaging (a tiny jug of apple juice!) or similarly superfluous reasons. But the BEST thing about that trip is that Dan and I discovered lime curd.


Lime curd, in a little jar on the shelf at a grocery store in Ithaca, was somehow the most bizarre and hilarious thing Dan and I had ever witnessed. We shrieked and laughed in that aisle until we couldn't breathe. Because, really, what the hell was curd, anyway? We had no idea, but it sounded horrifying and hysterical. It instantaneously became an inside joke we've tossed back and forth ever since.


(The photo on the right is of me and Dan, loosely around the time the infamous grocery trip took place)


But last year, I finally found out exactly what curd is: DELICIOUS.


Now, I've never made (or tasted) lime curd. I just can't bring myself to do that without Dan. It would be blasphemous. But I have become rather well aquainted with lemon curd, and I've got to tell you that stuff is stunningly tasty.


You can eat it right out of the jar. Off a spoon, your finger, whatever. Put it on toast. Put it on cake. Put it on anything and everything. Just please enjoy that tangy-sweet, sunshiney bit of heaven.


Or, you could really go all out and make a strawberry galette. A galette is a "rustic" tart. In other words: you don't have to bother with making the crust look all beautiful and professional because we're just going to lazily throw the whole thing together and say it's homemade and charming. Fantastic!


Strawberry Galette with Thyme Crust and Meyer Lemon Curd
(Meyer Lemon curd and Strawberry Galette adapted from Dishing Up Delights)


Ingredients


  • 1 pint of strawberries, sliced
  • 1 tablespoon honey
  • 2 teaspoons cornstarch
  • 1 teaspoon fresh lemon juice
  • 1 egg beaten with 1 tablespoon water
  • several tablespoons of lemon curd (although you can buy it in a store, it's super easy to make your own, which I did here. I can post the recipe if anyone's interested)
  • 1 1/4 cups all-purpose flour
  • 1 teaspoon salt
  • 3 teaspoons fresh thyme leaves
  • 1 stick butter, chilled and cubed
  • 2-4 tablespoons ice water
Directions
Mix the flour, salt, and thyme. Cut in the butter with a pastry blender (or do the whole thing in a food processor. It's a tart, not a pie, so I won't be picky). Add the ice water a tablespoon at a time until dough is just combined. Gather into a ball, cover in saran wrap, and chill in the fridge for at LEAST an hour (the longer the better).


Preheat the oven to 400 degrees. 


Mix the strawberries, cornstarch, honey, and lemon juice in a bowl and set aside.


After properly chilled, roll out the dough in a circle a 1/4 inch thick. Top with a few tables spoons of lemon curd, spreading the curd into an even layer over the dough, but leaving a one inch border around the edge. Top with the strawberry mixture, and fold the edges of the dough over the top. 


Brush with the egg wash mixture, and bake for 20-25 minutes, until crust is golden and filling is bubbly. Let cool before serving. If feeling truly decadent, top with homemade whipped cream. Swoon.


Tuesday, October 13, 2009

Post apple picking dinner...whadda we got?

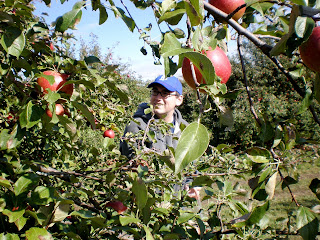
Apple picking was fun, fun, fun. It was a fine fall day and a nice drive down to the orchard. Riley and I were feeling good--we had both exceeded our job applications for the morning. See? Look, apple picking enjoyment!


For dinner later we were sort of planning on Eggplant Parmesan and Mushroom Risotto. We had leftover eggplants from a party we had for my Mom's birthday the day after we got here, but unfortunately the gifted plants had gone bad. But, we were hoping to find some replacement eggplant from the small farmers market in the town we're staying in, St. Croix Falls, WI. Instead we walked away from the market with habaneros and green onions. So, when we got home, we began one of our favorite games...what's for dinner? Well, whadda we got in the fridge and pantry honey!?

[a little explanation here. when we get to this point in the evening and we are wondering what we have for dinner it usually falls on me, the boyfriend, to come up with ideas. i'm not complaining, i love doing this, but i just want to make sure you all understand this. "whadda we got in the fridge" means, "what are you making for dinner, honey, cause you haven't said anything about it yet and i'm starving." oh, and sometimes i even get vetoed.]

THE PROCESS, of whadda we got, in dialogue:

"Well, we were going to make Mushroom Risotto and Eggplant Parmesan. The Eggplant Parmesan had Marinara sauce in it right, so we still have those ingredients, right?"

Tentatively, "Yes."

"Let's see, what else do we have? Hmmm..." Brats, carrots, tomatoes, green onions, Zucchini, mushrooms (for the risotto, of course), cherry tomatoes, onion, potato, beer, hummus, wine, rice, pasta, soup, cake, oatmeal, eggs, habanero, cheese, feta cheese, romano cheese, yogurt, flat bread, lots and lots and lots of apples, and... "...what do you think of this? Mushroom Risotto, fried brats, mushroom and green onion on top with a little Marinara over that!" [my college roommates would have been cheering at this point.]

*a very quizzical, apprehensive, scared, yet still starving look*

"Hey, risotto's good. Brats are good. Marinara is good............risotto with brats and marinara.....not so good?"

*meek, still starving and apprehensive look* "yeah...not so good?" **VETOED**

"Well--"

"--we have pasta don't we? What about that and marinara? And we have chicken in the freezer don't we?"

"But I want to use up what we have. And what about the brats and mushrooms?"

"Okay." [not really an answer, but in this situation it'll do.]

THE DINNER: Spaghetti Marinara, with veggies and brats.


Of course the land locked (and, obviously, in love) gorgeous gal loved it. She shredded some fresh Romano (a staple in our household) right beforehand and was ready and waiting when it was all served up. [i had to suggest taking the picture before she dug in and thus the discussion about this blog that led me to finally write my first contribution.] The whole thing was readily consumed before we could even really think about how good it actually was. There were some leftovers, and--naturally--we have some purposely spared mushrooms for my [i like to think] famous mushroom risotto...

David's Marinara

  • one whole chopped onion
  • a slightly less than equal amount of chopped carrot
  • about two cloves of minced garlic
  • approximately 1/4 cup red wine
  • one can tomato paste
  • four fresh tomatoes, peeled and roughly chopped
  • a very healthy amount of dried basil, and then some
  • some oregano
  • two teaspoons of sugar
  • two teaspoons of salt
  • ground black pepper to taste
Saute onion, carrot and garlic in olive oil for a few minutes until soft. Add wine, saute for a few more minutes. Add everything else, plus about a quarter cup of water and simmer on low-med for about 20 min. Cool, then puree. Once you have the texture you desire put it back on the low-med heat (here you should taste it and add whatever you think it might need. tonight it was a little more salt and basil.) for about 10 min (just enough time to boil the pasta, if you started the water boiling when you set the sauce to cool.)

Veggies and Brat

  • two brats, cooked and chopped
  • two green onion, sliced
  • one zucchini, chopped
  • four mushrooms, chopped
  • sugar, salt, ground black pepper
Toss everything together first and let sit for a few minutes. [whenever you fry/saute/whatever fresh veggies, always, ALWAYS, toss them with salt and sugar a few minutes ahead of time to "cut them" and open up the flavor.] Heat a frying pan (not non-stick) with a little olive oil to high heat. Add everything and stir continuously until the mushrooms are done and the brats are lightly browned. Done.

One Should Always Eat Muffins Quite Calmly. It Is The Only Way To Eat Them. *


There's a few things about the fall that really make it my favorite season. I love the crisp, sunny weather. I love all the colors of the foliage. And I really love apple picking.

Apple picking rocks. And last week, David and I went out to Aamodt's Apple Farm. It was everything an apple orchard should be, which both delighted and surprised me.

I know it's a bit narrow-minded of me, but apples come from New England. That's just always how I've thought about it. Apples are a New England thing. And going apple picking is something I remember doing as a kid, and then again sporadically in my adolescence.


A truly great apple picking experience requires two things: hot apple cider, and apple cider donuts. Aamodt's, clearly a worthy apple orchard, had both. In addition to the two bags of apples that we picked ourselves, we bought an additional bag at the store in the barn. We also bought some local honey (which I have been enjoying immensely in my morning tea) and I bought one tiny old fashioned caramel (which was out of this world).

But before the shopping, naturally, I insisted that we get to the heart of the whole apple picking experience: the cider and the donuts.

I like apples as much as the next gal, but the whole point of apple picking is going inside the barn, with your cheeks red from the crisp cool air, and sitting down on a wooden bench with a cup of hot apple cider and an apple cider donut to dunk in it. Mmmmm... I'm ready to go apple picking all over again!

...Not that we need to. We certainly picked our fill. We got a bit overzealous, actually, and wound up with way more apples than we could possible need. So I have been doing a LOT of baking. Apple butter, applesauce, German applecake.  Apple pies, apple crisp, and apple dumplings are forthcoming. And yet still we have apples upon apples upon apples in our kitchen.

One of my favorite recipes ever (and this is saying something) is my recipe for Pumpkin Apple Spice Muffins. You must, I mean, you really, really must make these muffins. Soon. They are a perfect bite of autumn. So aromatic, so flavorful, so GOOD. You can make them for a big brunch like I did two weeks ago, or you can make a batch for you and your family, like I'm about to do. These freeze extremely well, so you don't have to worry about devouring them all in one sitting, which is a very real danger because these muffins are THAT DELICIOUS.


Best Ever Pumpkin Apple Spice Muffins

Ingredients

  • 2 1/2 cups of flour (up to half can be whole wheat)
  • 2 cups of sugar (brown or white. I prefer brown, personally)
  • 1/2 cup of applesauce (I'm using homemade applesauce this time around, but store bought works just as well). 
  • 2 eggs, lightly beaten
  • 1 can of pumpkin puree; not pumpkin pie filling. (You can also use 1 cup of homemade pumpkin puree which I swear to try out myself sometime soon. In the meantime I'm a fan of Libby's).
  • Several apples, peeled, cored, and chopped. (Depending on size the number will vary. I used about 6 smallish-medium apples today. I like a lot of apple in my muffins!)
  • 1 tsp of baking soda
  • 1/2 tsp of salt
  • 1 1/2 tsp of cinnamon
  • 3/4 tsp of ginger
  • scant 1/2 tsp of nutmeg

Directions


Preheat the oven to 350 degrees. Combine eggs, pumpkin puree, and applesauce in a large mixing bowl. Add sugar, baking soda, salt, cinnamon, ginger, and nutmeg, stirring to combine. Add the flour one cup at a time, mixing well after each addition. Gently fold in the apples. Grease a muffin tin well (I recently discovered Baker's Joy and I'm in LOVE! I also like using cupcake liners). For nicely domed bakery-esque muffins, fill tin to the top with batter. This method will produce roughly 18 regular sized muffins. If you fill each tin 3/4 of the way full,  you can get 24 regular sized muffins. Personally, I prefer the pretty domes. Plus, more muffin! You can sprinkle some sugar over the tops for some crunch and sparkle if you like! Place muffin tin on the center rack and bake for 35 to 40 minutes, or until a toothpick comes out clean. Cool on a rack, and enjoy!


Keep your eyes peeled for the next Land Locked (and in Love!) post, which will be written by a very special guest!


* Lots of love, and perhaps a prize, if you can identify the source of the quote in the title!

Monday, September 21, 2009

i'm really happy for you, and i'mma let you finish, but...


Thanks so much to everyone who came out to the Beer Garden on Saturday Night for our Goodbye Party! It meant so much to us to have you there. I wish I had taken more pictures (I always wish that in retrospect. Must make more of an effort next time). There were lots of laughs, a few tears, and at least one Kanye West impression. I really couldn't have asked for more.

We're still interviewing for my replacement at work. Pamela swears she will make a decision today and I plan to hold her to it. We really want to get someone in to train with me, moreso than usual because I'm going to be leaving several major projects uncompleted and it will be a rough transition for whomever fills in. I am trying to get my ducks in a row, here, but it's getting really hard to focus.


David and I finally sat down and planned out our driving route. We're driving a u-haul all the way out to Minnesota; did I mentioned that? From New York to Massachusetts to Ohio to Minnesota. About 27ish hours of driving total!

I'm tempted--so tempted!--to buy some kind of ipod car converter device so we'll have some audio control along the way. But it's sort of a foolish waste of money at this point. Not to mention that it's been years, literally, since I've actually spent any time listening to the radio. It will be good for me.

We're really down to the wire now: 6 days until we leave.  The apartment is disheveled and strewn with boxes--some packed, some half-packed, some empty. Our refrigerator is void of everything but condiments and some yogurt. Oh, and some limes.

Speaking of limes (this is actually an unplanned segue, so forgive me. We're venturing off the beaten track here), didn't I promise you the recipe for my favorite summer cocktail a while ago? I definitely did. Might as well do that now, huh?

The Long Vodka


ingredients
  • bitters
  • vodka
  • tonic
  • lime
  • ice

directions
Shake a few dashes of bitters over ice in a tall glass. Add two shots of vodka, the juice of half a lime, and top off with tonic. Add a slice of lime for garnish if you want to be fancy. Stir, enjoy!


In fact, I'd be tempted to make one myself if I were going directly home this evening. As it is, though, I'm putting on my best Mad Men pearls and hitting the town with Donna Bagdasarian. If we hit up Employees Only for one last farewell--as we are wont to do--I fear there's far more sinister drinks in my future!